Monday 28 July 2014

Craft Challenge w/c 28th July 2014

This is our last session before my summer break and so we will doing a catch up session from the last few weeks, I will be demoing the lovely flourish stamps that came into our in-house library last week and we will be getting the dies back out for you to make the most of....These include the T-cup die (a special appearance) the mini cake stand, the flourish thick die which I don't think was actually used last week and this is great to die cut chip/mount board.

We now have so many lovely new grey rubber stamps it will be great to play and get some bits stamped out for you to use whilst we are off.

So, bring with you, plenty of card stock for die cutting or stamping, and if you want to have a go at lots of heat embossing remember to bring your powders.  If you have anything you have bought and want more ideas bring it along and hopefully I can give you some ideas.

The Pine cone die is now in the kit for you to use plus the oriental arch and mirror frame, Yippee!!!! these are really lovely dies...and the pine cone dies look great when they are cut from taupe colour card.  I will pop a pic on here of the dies soon.

Just to remind you I will be off for all of August and we start again in September with loads of new ideas and lots of new  grey rubber stamps.

Tuesday 22 July 2014

New Grey Rubber Stamps for our in-house library

Here we have x20 new grey rubber stamps for you to use every week for Craft Club Members.  They are beautiful flourishes and swirls and I am sure will be a great addition to our in-house library of Craft Equipment.


Enjoy!

Monday 21 July 2014

Craft Club Challenge-w/c 21st July 2014

Mini Cupcake Stand

There is always an occasion where these little cake stands are a great addition to the decorations, be it Christmas ornaments, party favors holding chocolates (great for weddings), individual stands for a scrummy cupcake, and as you can see below just a lovely stand to display home decor, once you have made one you'll be hooked!
They look lovely in pretty papers or great in simple card stock....the heavier the item to display the thicker the card stock should be and the more base stands required.


As you can see below in the photo below ...this shows a large black dome....this is in fact a piece of scrunched kitchen foil made in that shape then painted with black acrylic paint and this is now ready to take 3D decorations such as flowers, pre-brought or hand crafted (paper or fabric), sweets, altered art style of paper decorations such as masks, crowns, wings, cogs, tickets etc.  This cone enables decoration visible from all side and the best glue to attach your decorations is Pinflair Gel glue/silicone, or a hot/cold melt glue gun.
I hope you have as much fun with these as I have had.  I will be demoing how to make the stand and will leave the decoration up to you.  To get the most out of the session you may like to plan ahead and create at home some 3D flower decorations/ leaves/altered art pieces etc ...there is no rush you can simply create the stand and take them home to finish off.

You will need:

  • Good wight decorative papers (they should be lightweight card really) you will also need good weight card stock to strengthen your piece.
  • Tacky PVA glue....cheaper PVA glue is harder to use as it has more water content and in recent weeks I have used a lot of mine to compensate for cheaper glues or if people forget so please make a short note to bring it with you.
  • Ribbons (thin ribbons work better around the base), gems and pearls, flowers, fine border peel-offs, mini bows,
  • You may want to do some stamping/embossing its up to you.
  • You may also like to bring your border dies if you have them....thin ones work well or what ever you have.
.....and that's it... go vintage, altered art, matching your decor at home, funky, Christmas or Halloween, wedding, kids party.  These also make a great stand for a birdcage (use our dies and make them fit!)

Go that step further and create a glass effect dome to go over the top...use the top of a clear plastic drinks bottle or use outdoor plastic party glasses, make sure they are a good dome shape, snip the stem off and add an accent on the top to cover where the stem was removed.

I will be adding in more grey rubber stamps to our stash for you to use each week...Just a little reminder...one of the stamps was left out on the table on an acrylic block and the box was on the shelf.  Please ensure all the stamps you use are washed well (so bring your Alcohol free baby wipes) and dried and put back in the appropriate box (keep the box out till you have finished with the stamp) These stamps will be easily lost as some are small and they are loose. 

The grey rubber stamps for this week are a huge selection of flourish stamps.... will post the contact sheet here shortly.

Looking forward to a great week and for those who are a Pinnacles club member don't forget their discount weekend starts this Friday and ends Sunday.

Monday 14 July 2014

May be a delay due to Road Works week commencing 15th July 2014


Please be aware the South Fambridge Road is being re-surfaced  with effect from Tiuesday 15th July 2014 and although the road will not be closed there may be some delays so please leave a little extra time to get here.  If you are stopped and then ignored please insist on being allowed to pass and state that you live in the village.

If there are any problems give me a call on (01702) 206910 
Thanks

Next Pinnacles Club Members Craft weekend - coming soon!


Lots of discounts and bargains...don't miss out.  Discounts also available in the on-line shop if you can't make it in person.

I am going, hope to see you there.
              

Craft Club Challenge- w/c 14th July 2014

Hi all, hope you had a great weekend....a bit soggy, I know....at least the sun is shinning today and the weather is set to get warmer as the week goes on!  Hot, hot, hot!

Here is this weeks Craft Club Challenge:

Feathers, Masks and Crowns

Here are the new grey rubber stamps going in to our craft equipment kit from now on and I will be using them on this weeks demo:

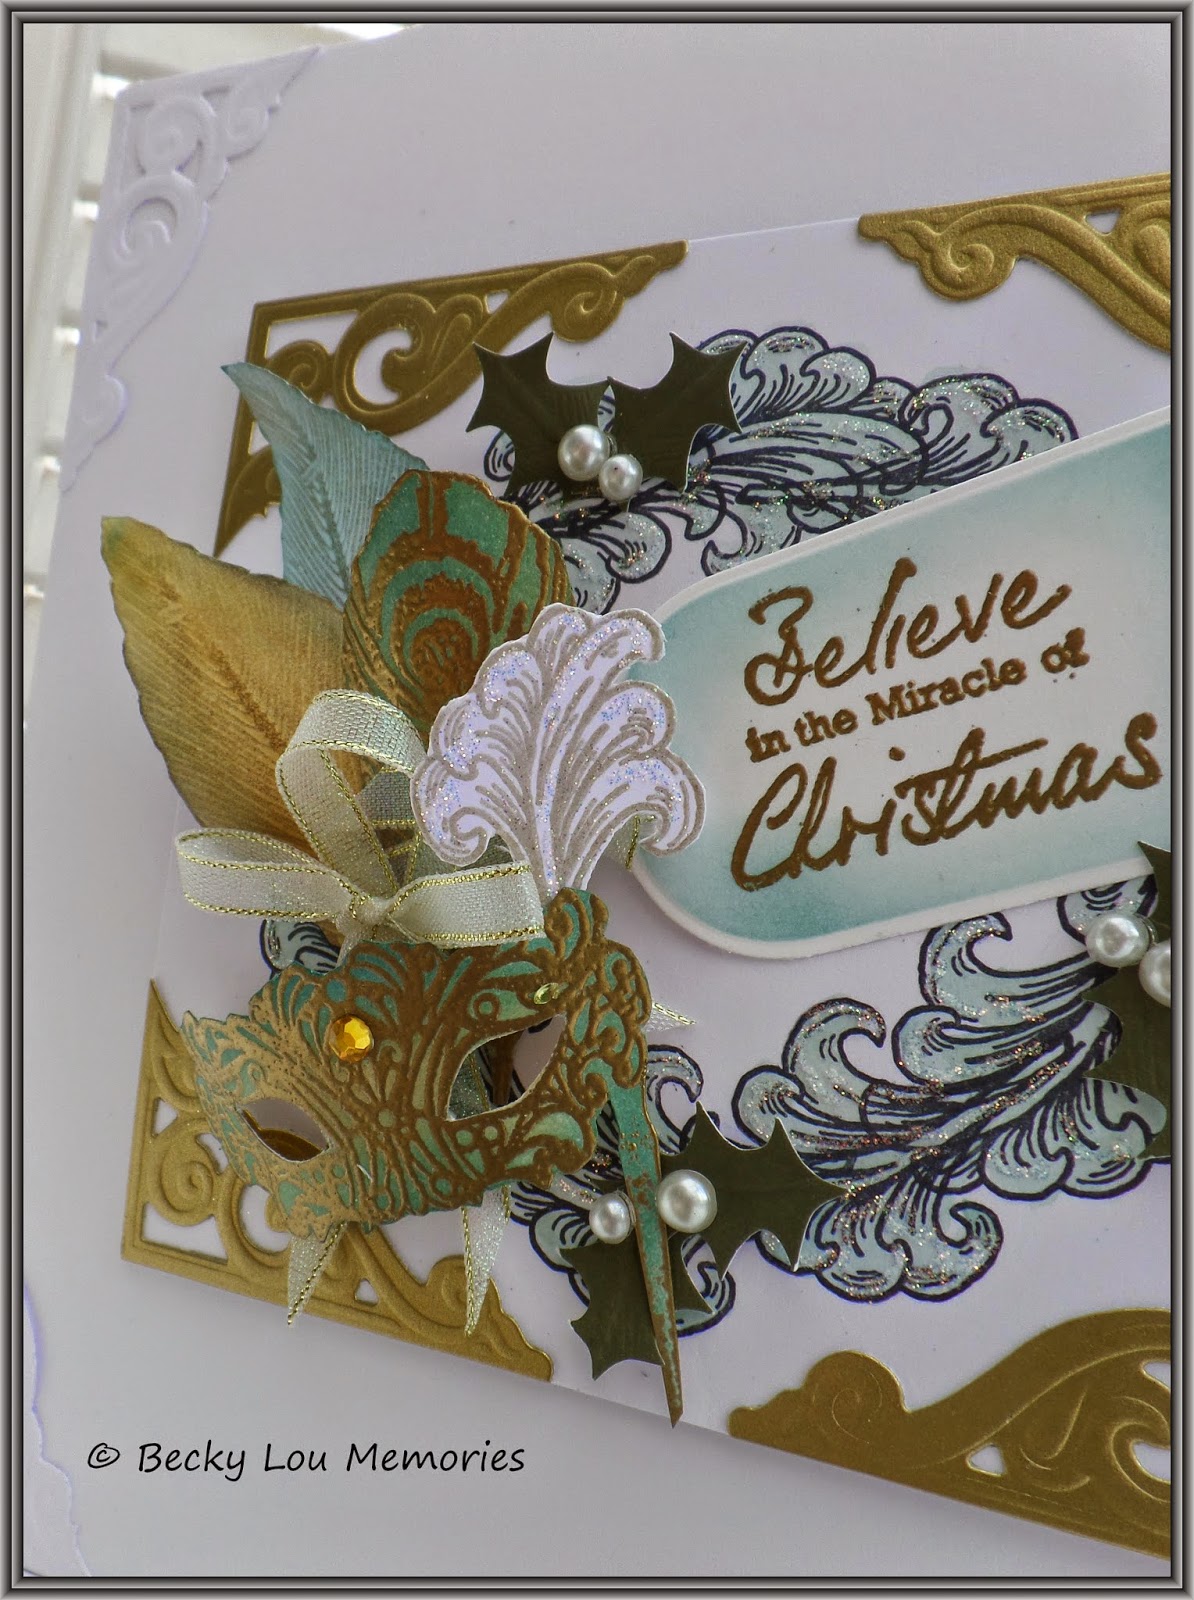
...and as you know, I am leaning toward the Christmas theme (but I know some of you are horrified of even thinking Christmas at the moment) and so here is my sample for this week:
(Click once on the Photo to enlarge)

as you can see I have used the mask for a Christmas theme....there are still a few extra snow flakes to go on ....but this is such a great set of stamps to use in any which way you want....more ideas will follow as the week goes on so keep an eye on here for more photos.  I have also dipped into our x 82 new wording/phrase stamps and used the "Believe in the Miracle of Christmas" stamp.

If you want to have a go at the Demo card you will need:
  • your base greeting card
  • plain white or cream and also contrasting card if you want to add additional layers.
  • I have the peacock embossing folder here for you to use this week.
  • You may also like to bring....pigment inks for embossing with powders or colouring  the card as I have done with the mask...embossing powders, chalks such as Pan Pastels, Mica powders, guilding foil flakes, metalic/pearl paints...glue pens and glitter, glitter glues such as stickles.
  • for those who have the Utee embossing powders you may like to experiment with the masks and emboss into glazed mount board tiles so bring your Utee and Mount board.
  • Gems and ribbons
This is a lovely set of stamps for going to town with the glitz and sparkles!  I have used a pine cone die which I borrowed from Jan on Friday and this will not be available  but there is plenty to choose from to make a corner decoration.

Here is another card just finished today ...Tuesday:


Have a great week.


Monday 7 July 2014

Craft Club Challenge - w/c 7th July 2014

This week is a catch up week, so bring along any cards you are yet to finish....and I challenge you to finish them!  It's hard I know... and yes I have many unfinished cards but I am determined to get them done.  If you missed any of the demos and want to try one let me know....and I will get you started and don't forget all the stamps, dies and equipment we have used over the last 3 weeks are available to use.

More stamps going into the kit this week and a photo of last weeks Christmas grey rubber stamps and the letter dies plus a See Dee foam mat for rubber stamping:


 Reindeer is upside down...ooops!...but you get the gist....these contact sheets appear roughly stamped and that is because I have stamped these out using Distress Inks and being water based they are easier to clean!  I have also left a bit more room on the contact sheet as I may be adding more in the future.  These grey rubber stamps are in addition to hundreds of other stamps already available for you to use each and especially a christmas drawer of stamps and punches .


We now have a few additional spaces in the club and I will be advertising soon, which fortunately I haven't had to do for some years so if you know anyone who fancies the Craft Club (various days) or Sewing club on a Thursday afternoon get them to call me asap (10702) 206910 as the places will go pretty quickly once the advertising goes out.

Have a lovely week and see you soon.